RISE Trigger Install
A Step-by-Step Guide on How to Install a Drop-In AR Trigger
You have your new RISE Armament RA-535 Advanced-Performance AR Trigger — or a different RISE AR trigger model — but how do you install it? It’s a simple process that should take less than 10 minutes. We’ve demonstrated the process on a standard forged receiver with a mil-spec trigger. Step 3 will vary if you have another drop-in or cassette-style trigger installed, but you will still remove the trigger at that time.
You have your new RISE Armament RA-535 Advanced-Performance AR Trigger — or a different RISE AR trigger model — but how do you install it? It’s a simple process that should take less than 10 minutes. We’ve demonstrated the process on a standard forged receiver with a mil-spec trigger. Step 3 will vary if you have another drop-in or cassette-style trigger installed, but you will still remove the trigger at that time.
These instructions apply to the following RISE triggers:
RA-535 APT Installation
RAVE 140 Trigger Installation
Blitz Trigger Installation
RA-434 & Patriot Trigger Installation
LE-145 Trigger Installation
ICONIC Trigger Installation
How to Install Your RISE AR Trigger
You will need safety glasses, a brass or nonmetal punch (smaller than .154″), a hammer (we recommend a ball-peen hammer), 5/64 Allen wrench, flathead screwdriver (type of screwdriver may differ depending on rifle manufacturer’s grip screw).
Before You Begin: Make sure your firearm is unloaded and clear, and wear eye protection.
1. Remove the Upper
After ensuring the gun is clear, remove the upper receiver.
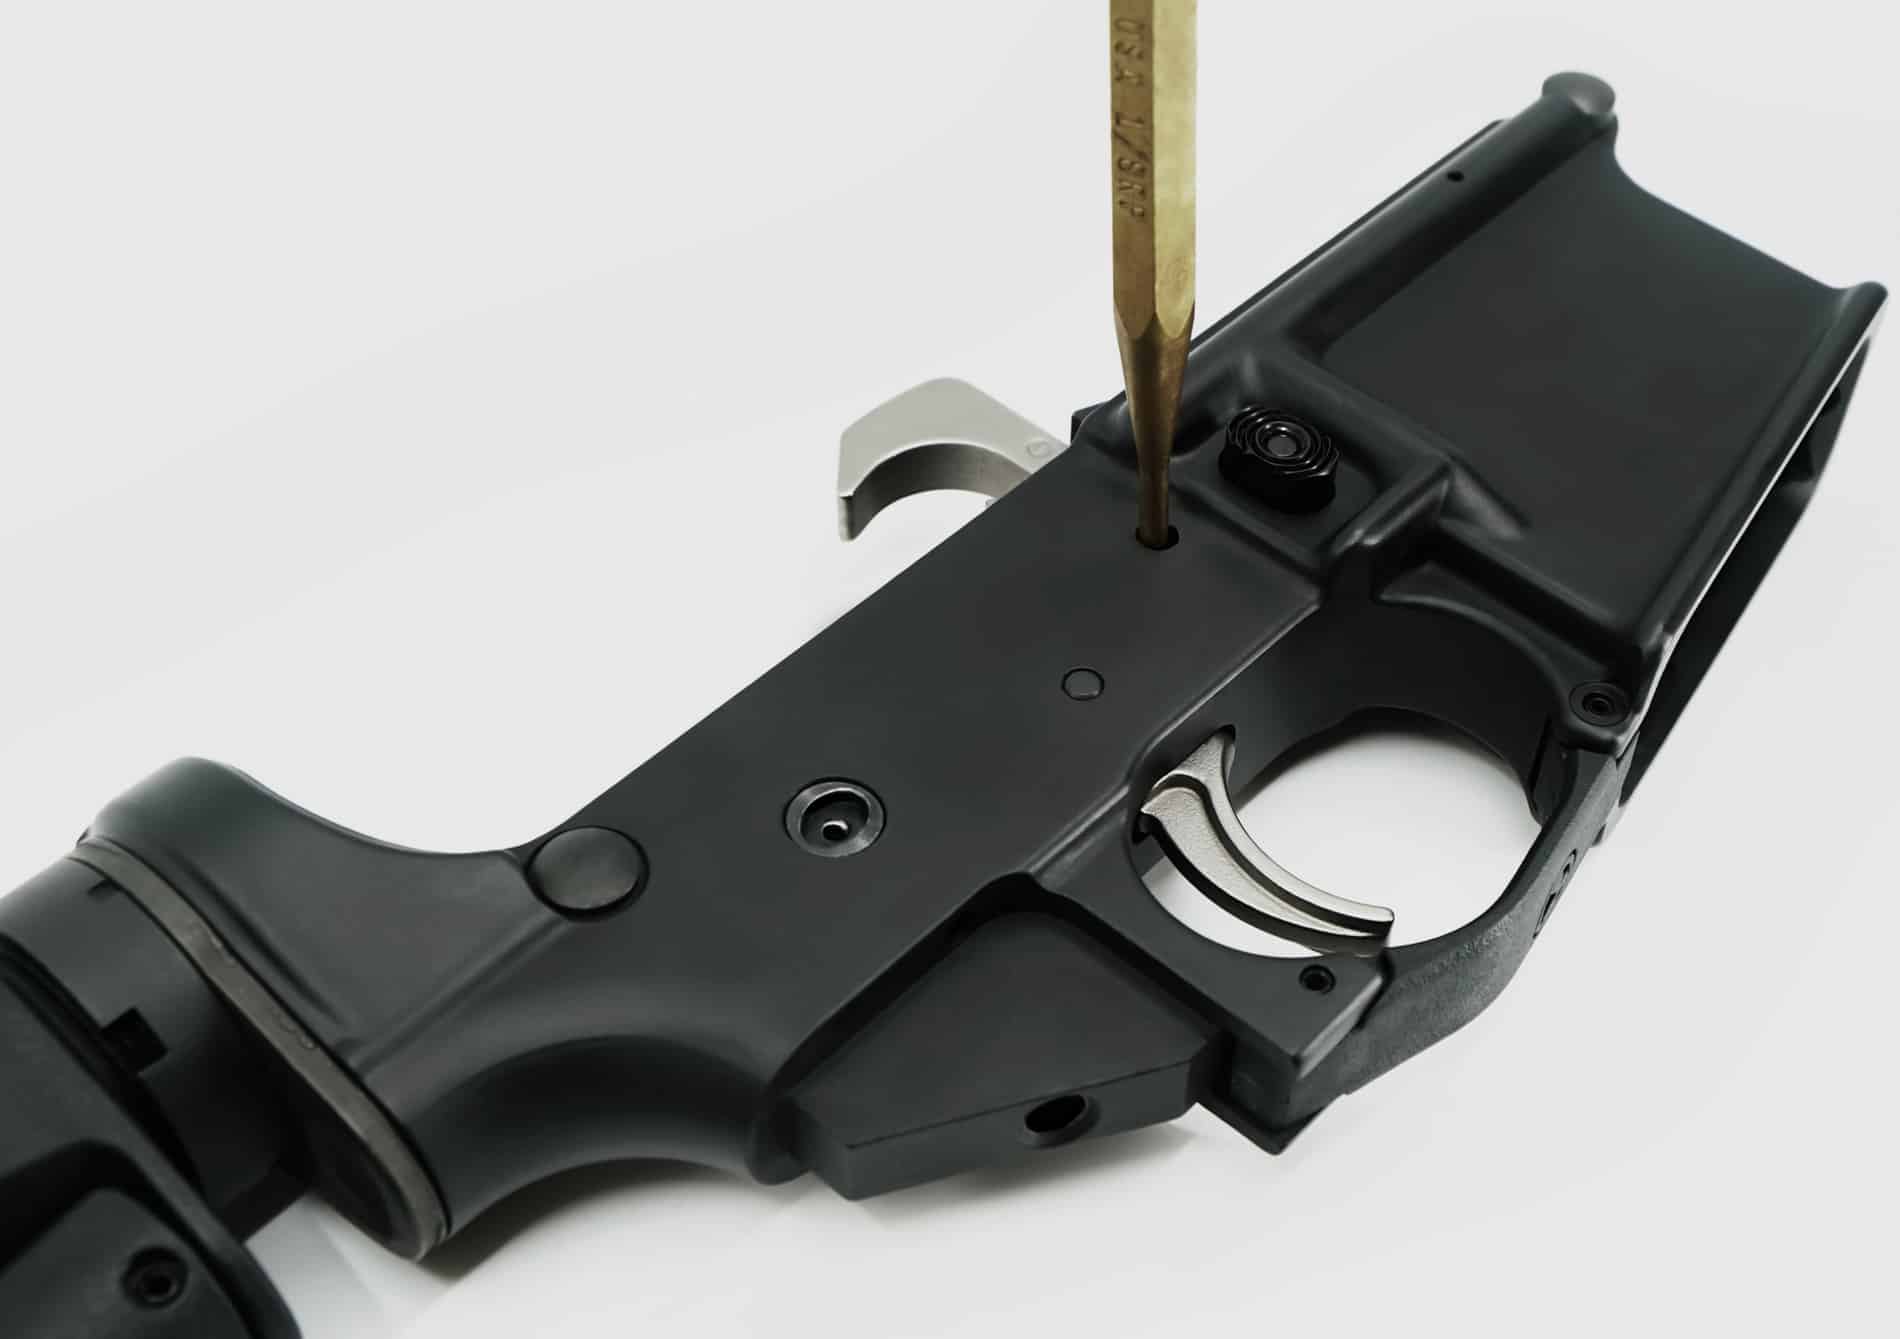
2. Remove the Grip and Safety Selector
Secondly, loosen and remove the grip screw on the inside of the grip. Carefully remove the grip to expose the spring inside. There is a detent behind the spring; both are small and easily lost. Remove the spring and detent, using your hand or a bin to catch the detent. Then save them for reinstallation.
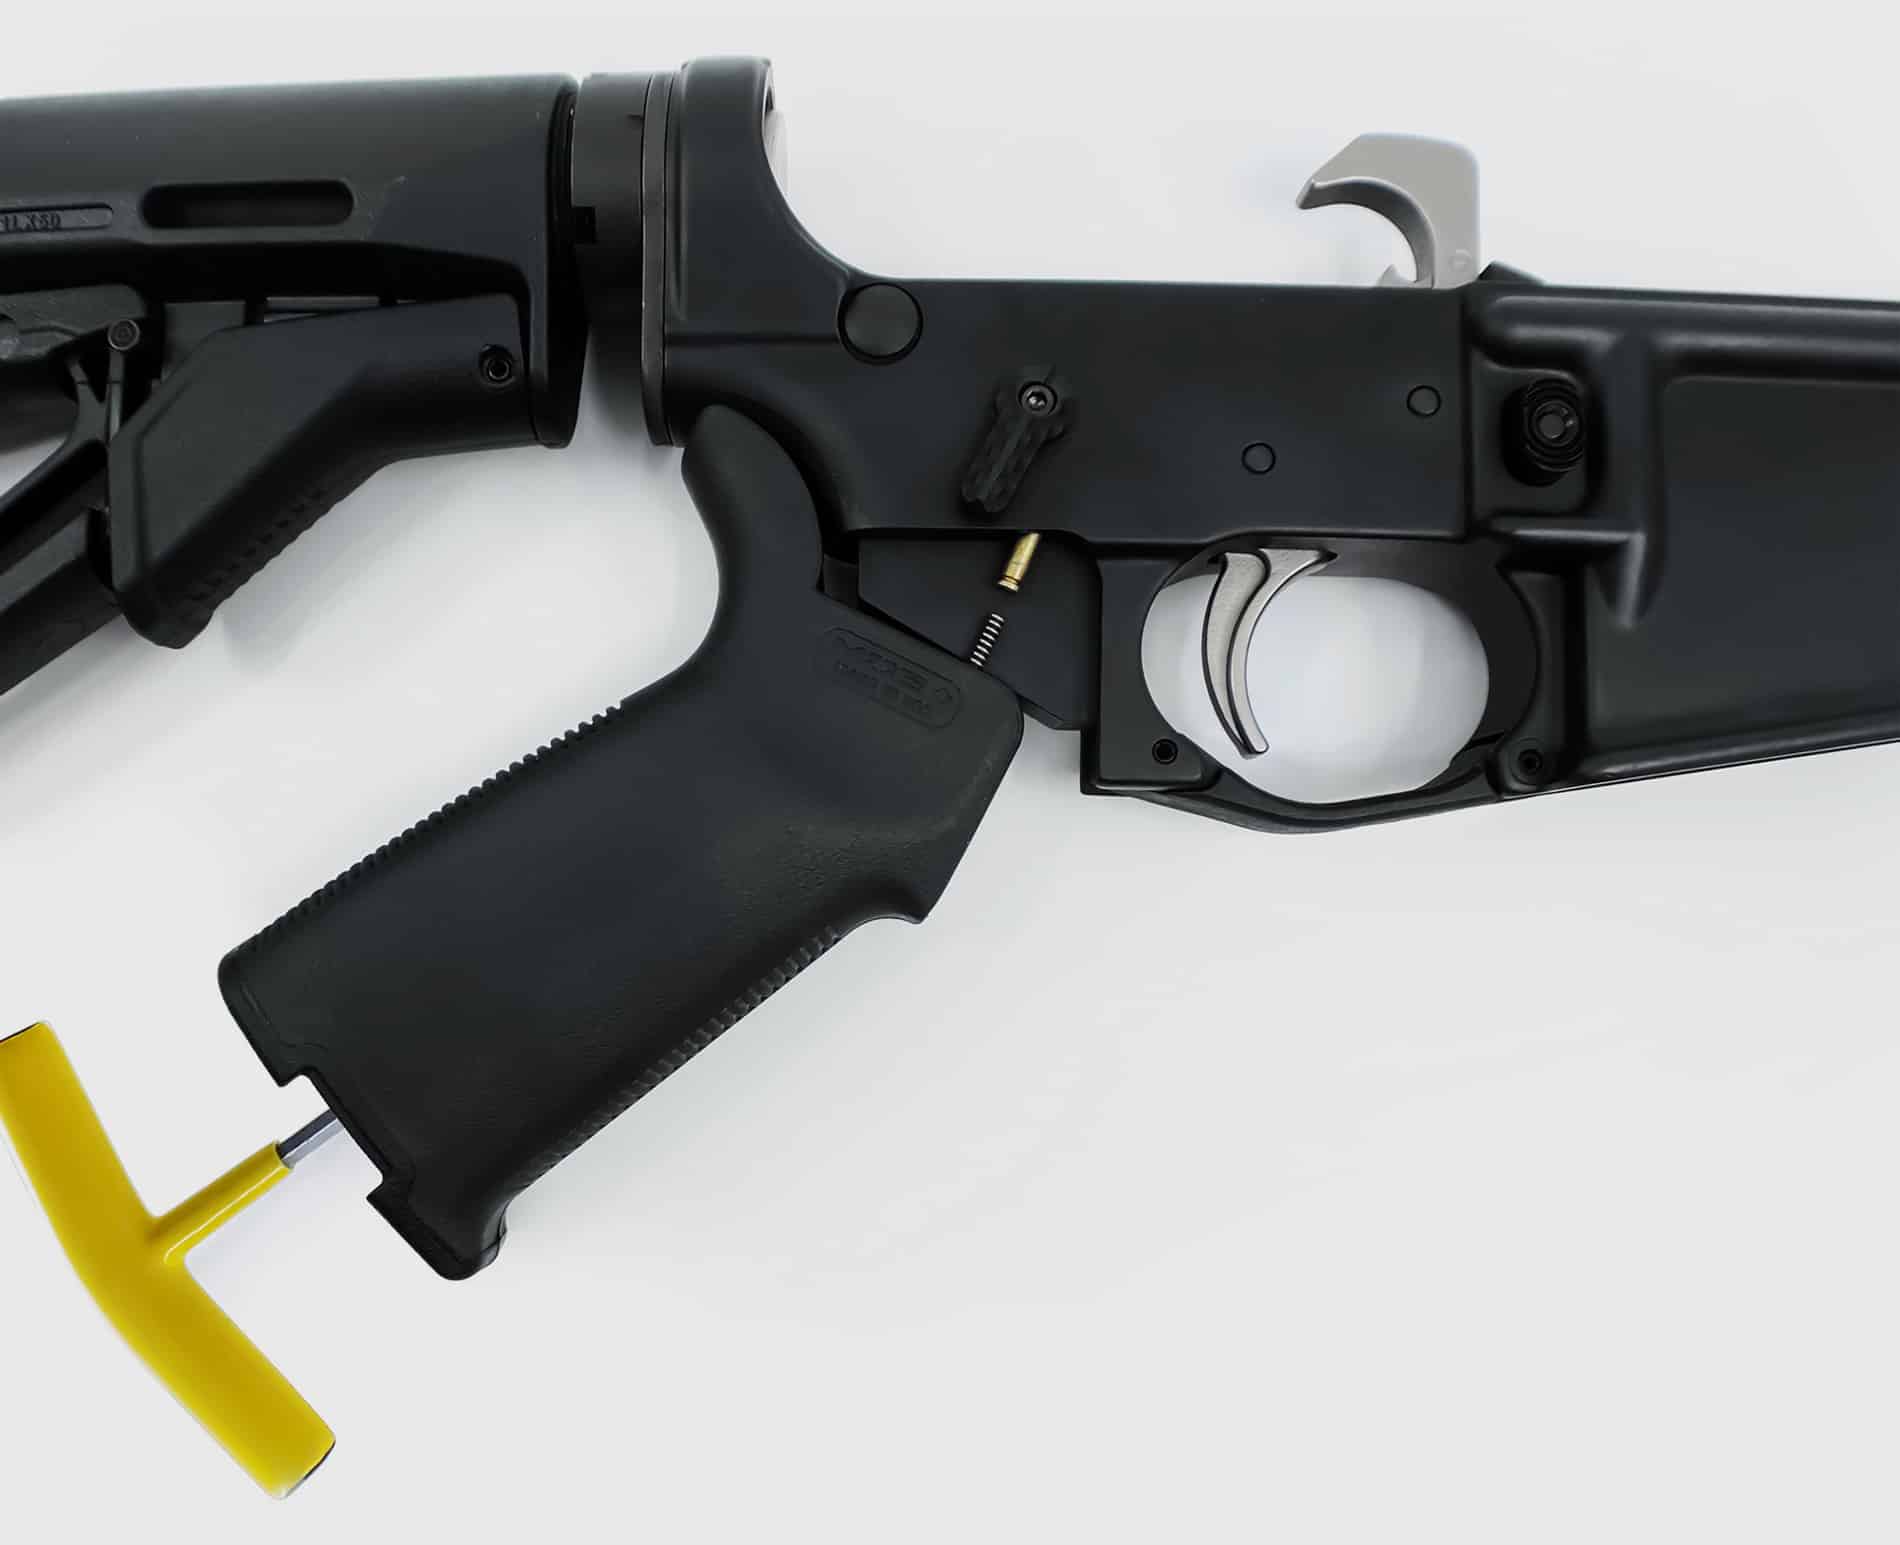
Remove and set aside the safety selector.
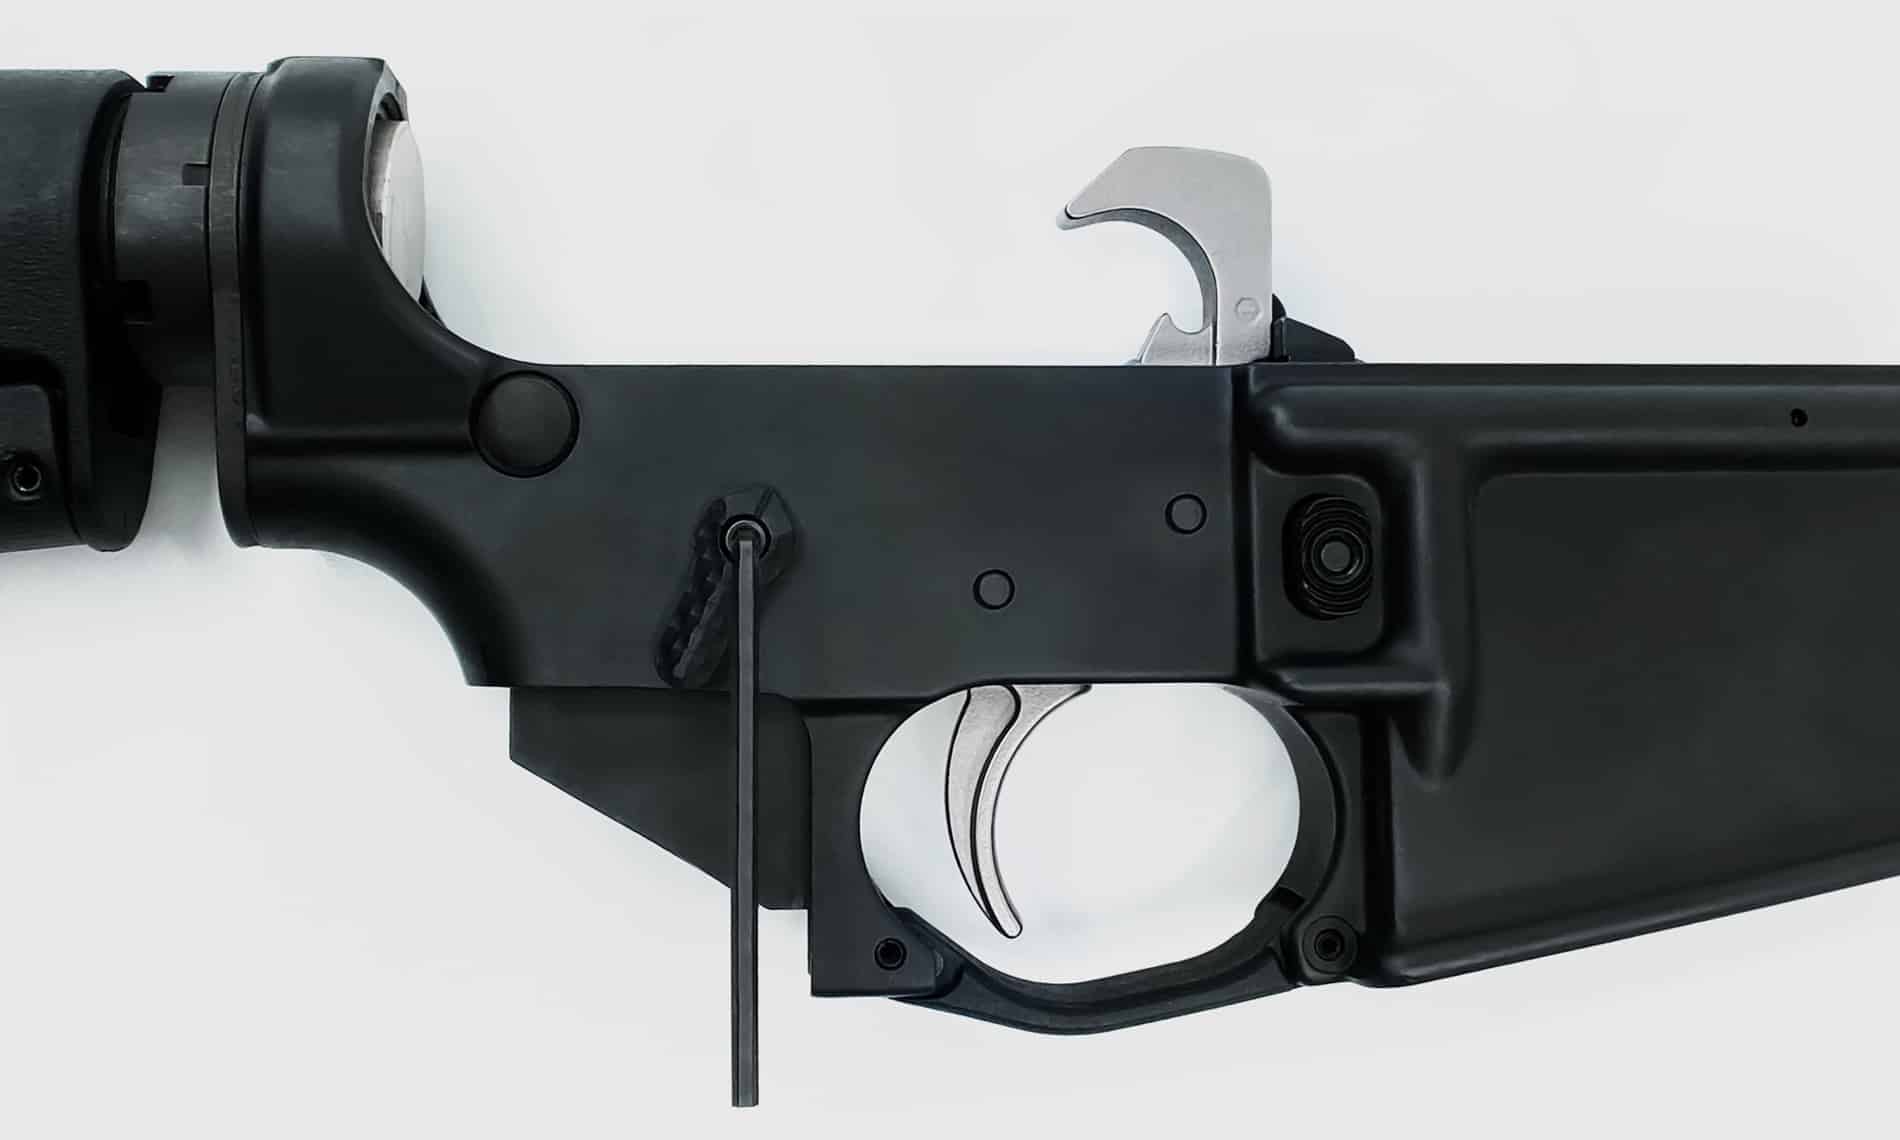
3. Remove the Existing Trigger
If a cassette-style trigger is currently in the gun, remove its pins and the trigger system.
If the gun has a mil-spec trigger, use a small brass punch or nonmetallic item to press out the hammer pin and remove the hammer and hammer spring. Press out the trigger pin. This may require pressing down on the disconnector. Remove the disconnector, disconnector spring, trigger, and trigger spring. The hammer is under tension and may spring out.
The pocket that everything was in should now be empty and ready for your new trigger.

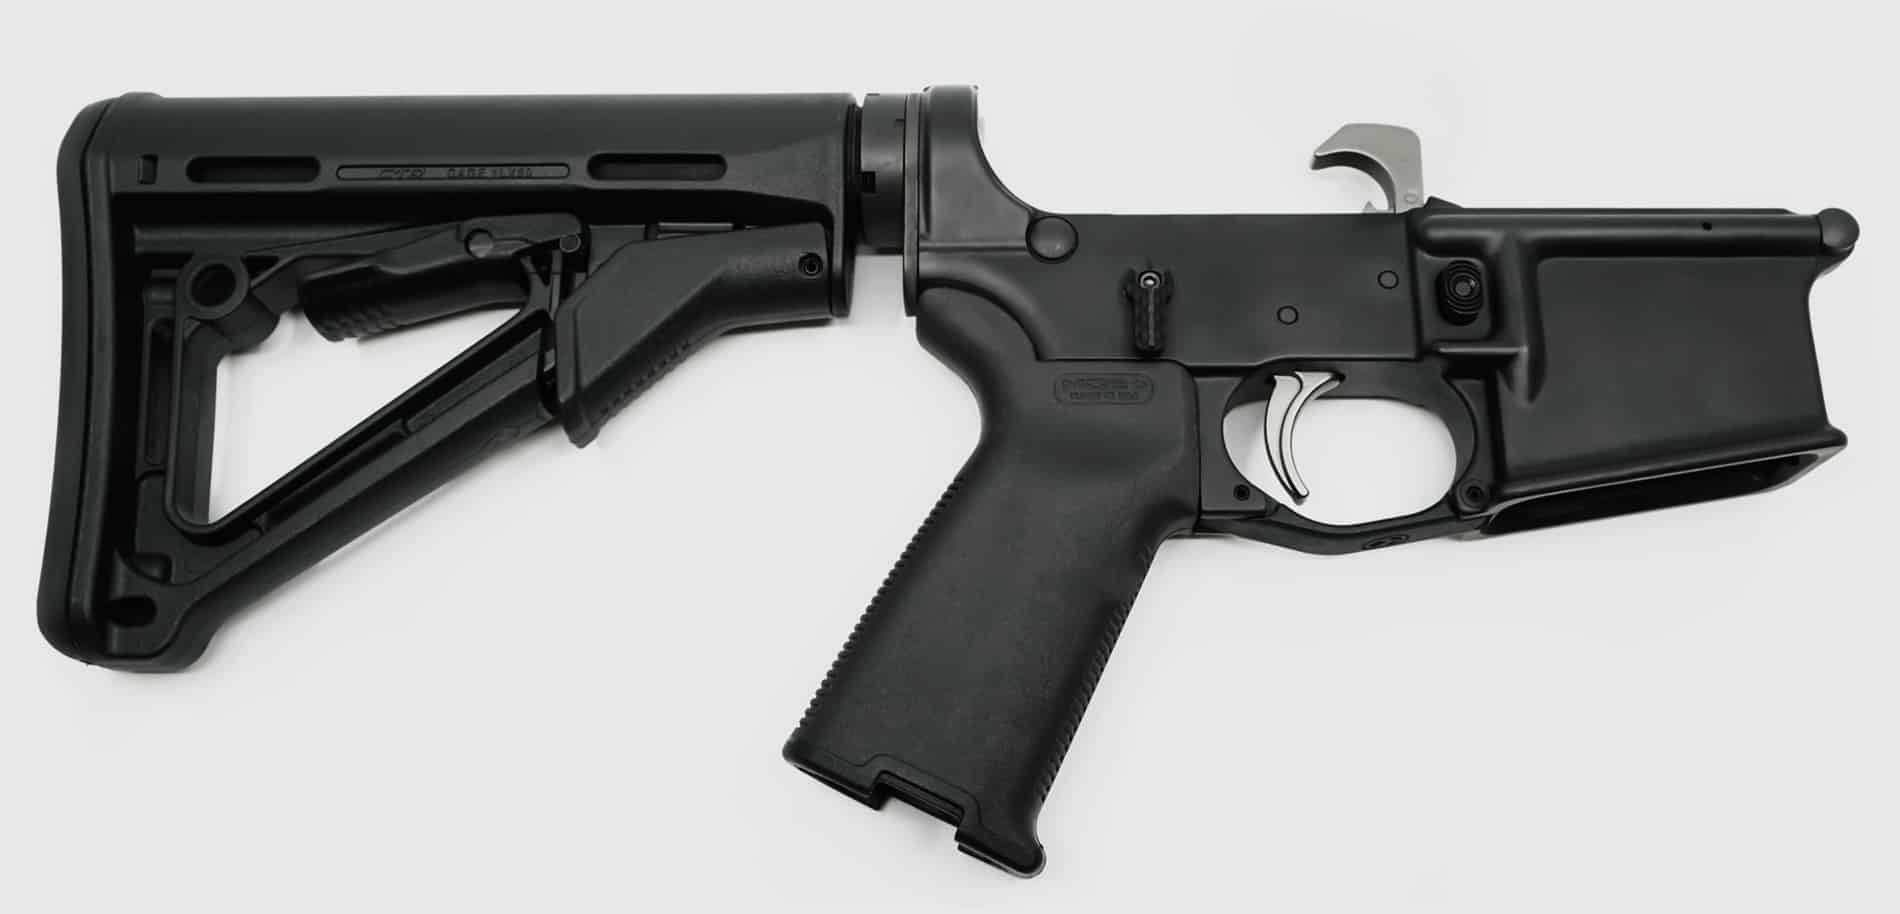
4. Install the RISE Trigger
Drop the RISE trigger in the pocket using the holes as reference for direction; the trigger’s and receiver’s holes should align. Install the included anti-walk pins (or anti-rotation pins if it’s an RA-535 Advanced-Performance Trigger). For each pin, it’s helpful to use one of the enclosed 1/16” Allen wrenches to hold one screw while using the other 1/16” Allen wrench to tighten the screw on the other side.
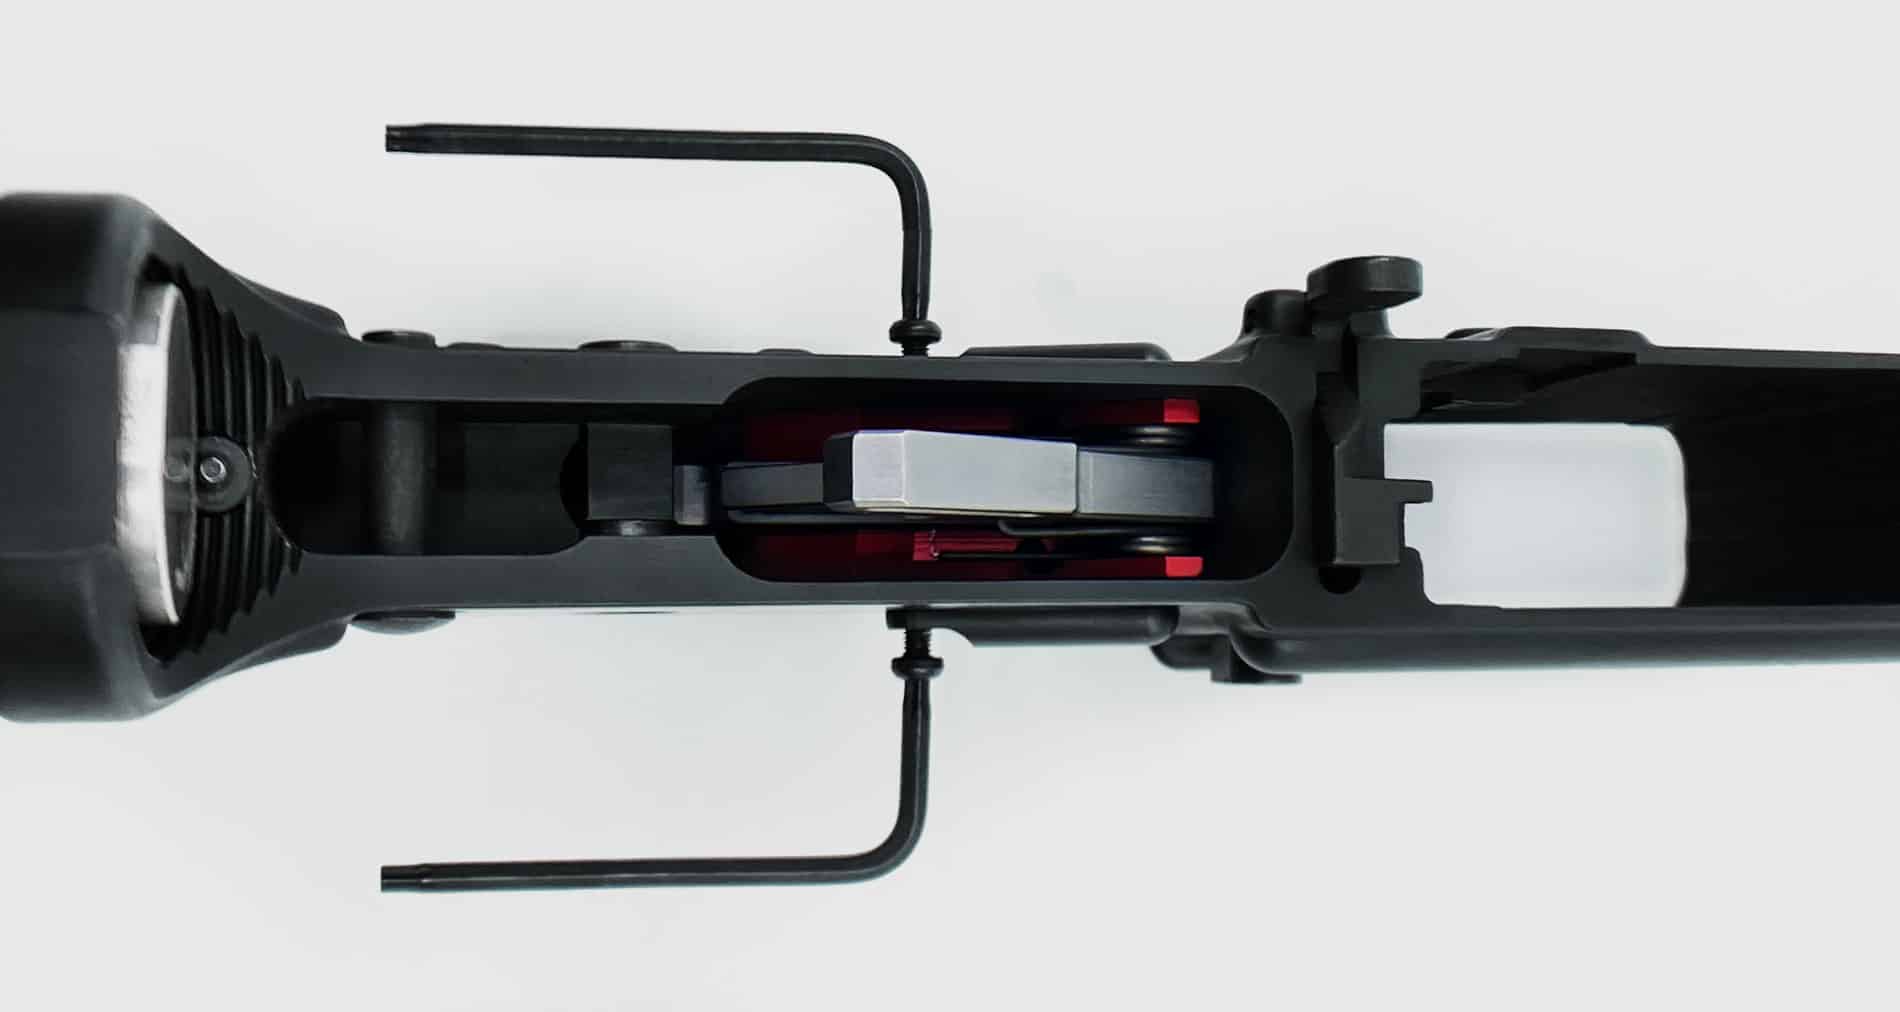
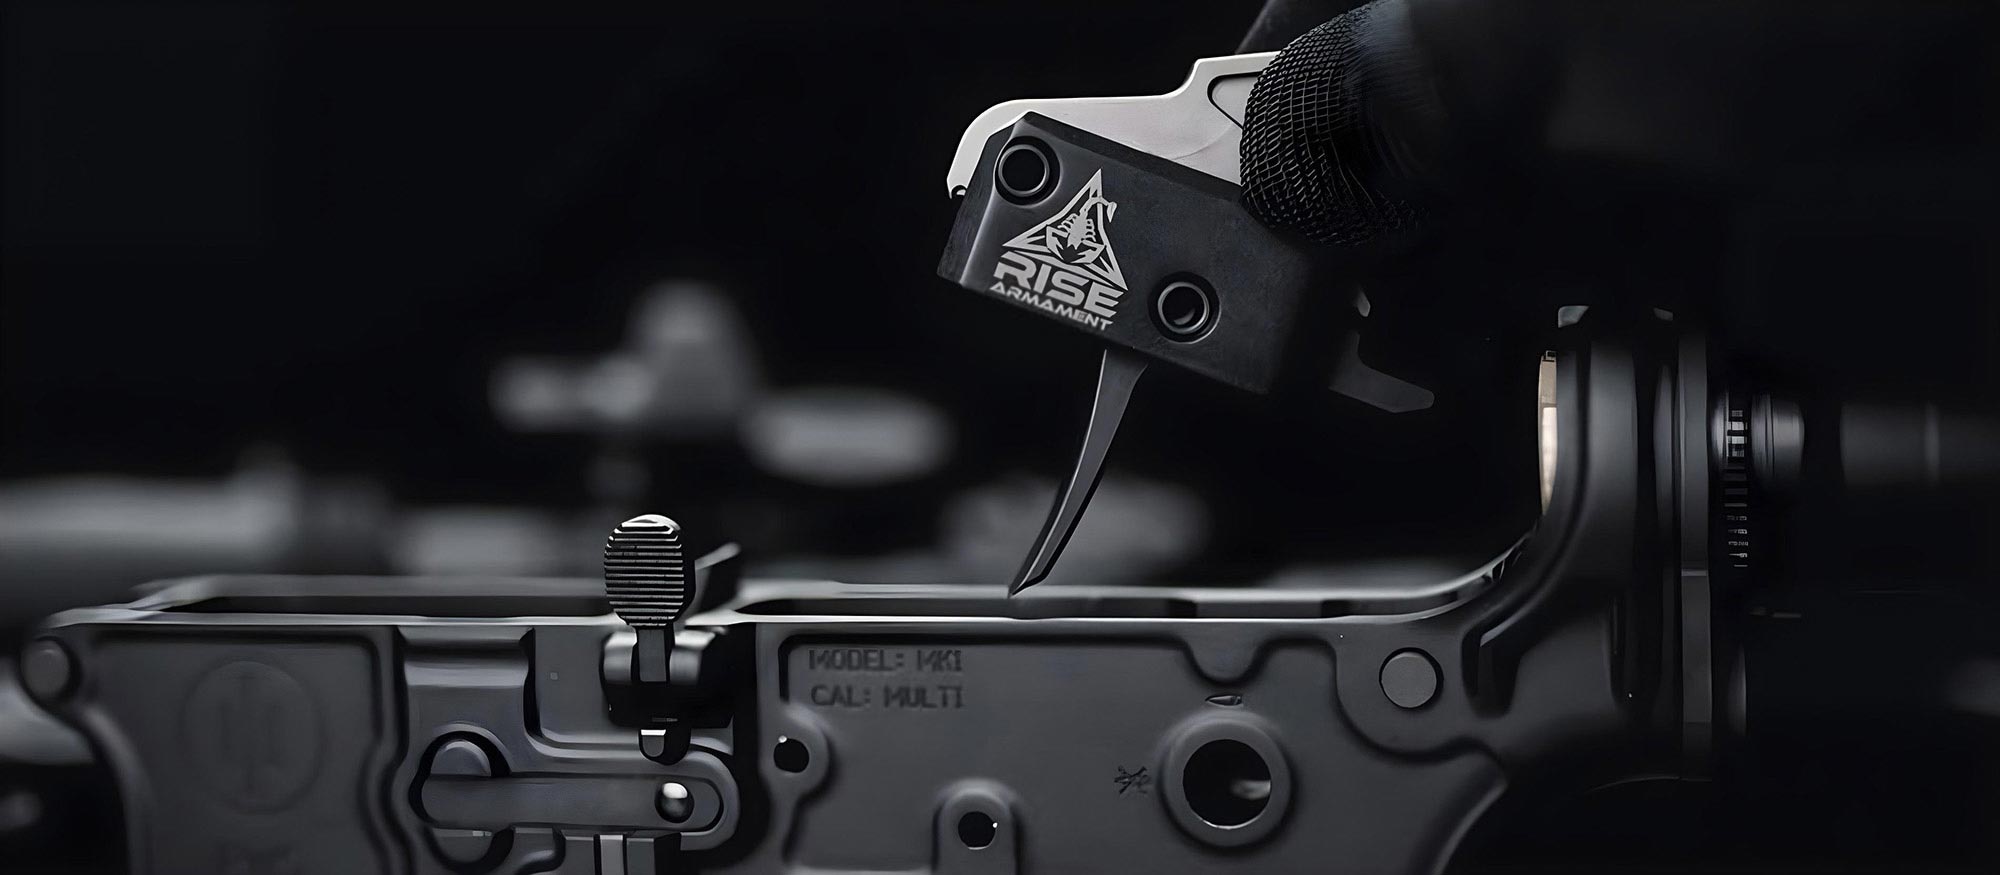
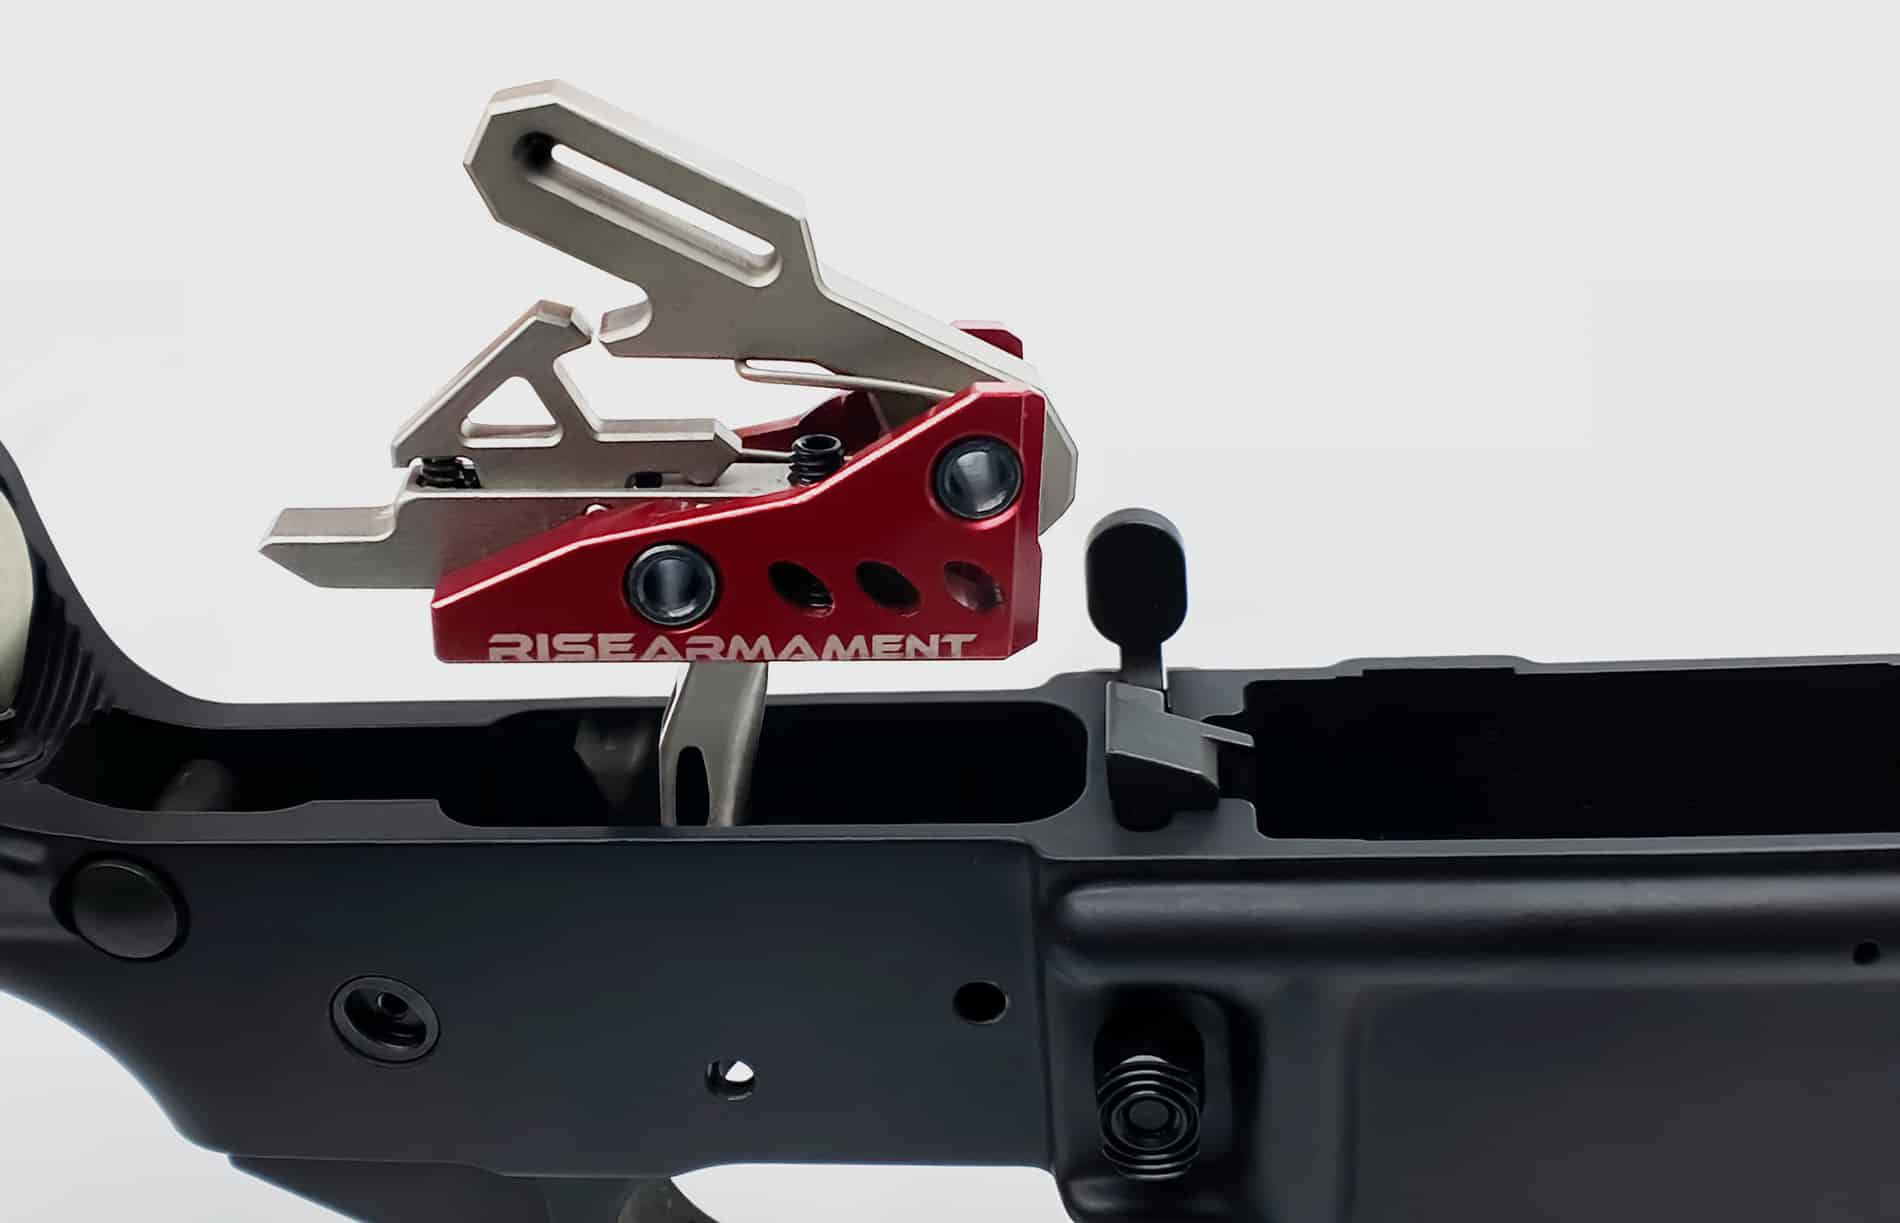
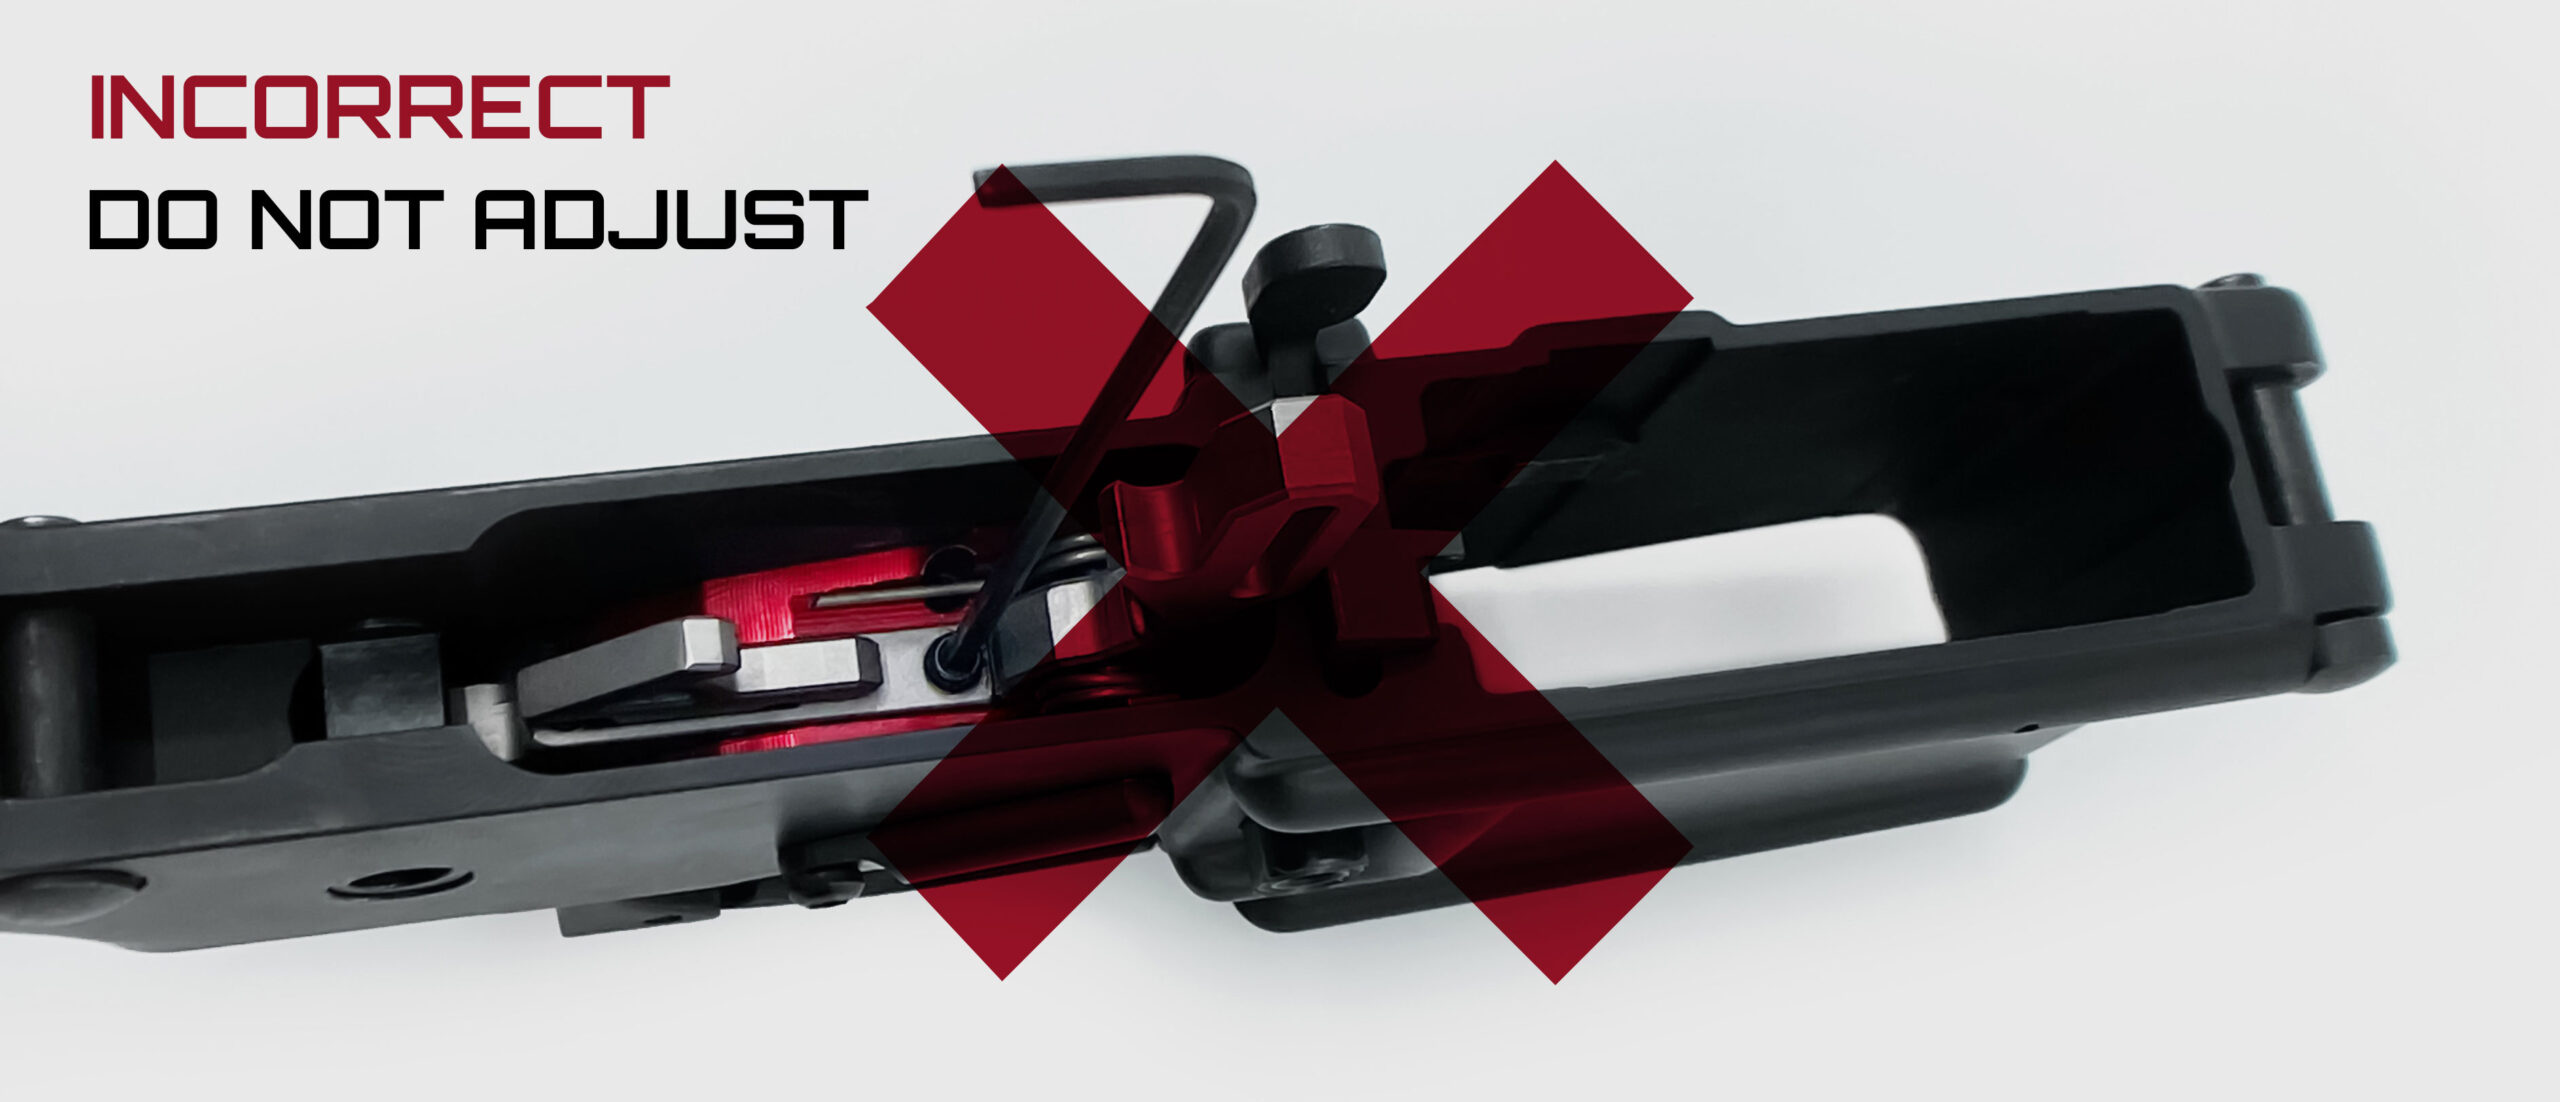
5. Tighten the Set Screws

There are two small set screws located on the trigger system under the hammer spring legs. Release the trigger’s hammer to access them. (See image above.) Lift or shift over each hammer spring leg and use the included 5/64” Allen wrench to snug the setscrews to the floor of the receiver. (The 5/64” Allen wrench is the longer one on the back of the package, not the shorter one with the pins.) Do not overtighten the setscrews, simply turn them until they’re snug.
6. Reinstall the Safety Selector and Grip
Reinstall the safety selector. Then reinstall the grip assembly with the detent, detent spring, grip, and grip screw to their respective positions.
7. Perform a Function Check.
Perform a function check to verify correct installation.
RISE Rave 140 and Blitz Trigger Installation Instructions
- Remove the Upper
After ensuring the gun is clear, remove the upper receiver. - Remove the Grip and Safety Selector
Secondly, loosen and remove the grip screw on the inside of the grip. Carefully remove the grip to expose the spring inside. There is a detent behind the spring; both are small and easily lost. Remove the spring and detent, using your hand or a bin to catch the detent. Then save them for reinstallation.Remove and set aside the safety selector. - Remove the Existing Trigger
If a cassette-style trigger is currently in the gun, remove its pins and the trigger system.If the gun has a mil-spec trigger, then use a small brass punch or nonmetallic item to press out the hammer pin and remove the hammer and hammer spring. Press out the trigger pin. This may require pressing down on the disconnector. Remove the disconnector, disconnector spring, trigger, and trigger spring. The hammer is under tension and may spring out.The pocket that everything was in should now be empty and ready for your new trigger. - Install the Safety Selector and RISE Trigger
Drop the RISE trigger in the pocket using the holes as reference for direction; the trigger’s and receiver’s holes should nearly align. Reinstall the safety selector to help align the trigger and receiver’s pin holes. Install the included anti-walk pins. To do this, we recommend inserting one of the pins in the hammer pin bushing (the upper hole) first, followed by the trigger pin bushing (the lower hole). You might need to apply downward pressure on the trigger to align the holes. For each pin, it’s helpful to use one of the enclosed 1/16” Allen wrenches to hold one screw while using the other 1/16” Allen wrench to tighten the screw on the other side. Note: If you’re installing the trigger in a 9mm AR (a PCC, for example), we recommend anti-rotation pins, rather than anti-walk pins, because of the more extensive wear and tear on the parts. - Reinstall the Grip
Reinstall the grip assembly with the detent, detent spring, grip, and grip screw to their respective positions. - Perform a Function Check
Lastly, perform a function check to verify correct installation.
Note: The instructions are for reference only. Refer to your local gunsmith or dealer for professional installation advice. The assembly or installation of firearm parts and components should only be performed by a qualified gunsmith or certified armorer. Using a rifle assembled incorrectly or assembled using incorrect or modified parts can result in a damaged rifle, property damage, personal injury or death. Manufacturer is also not responsible for any injury or damage resulting from the improper installation or use of our products. Always practice gun safety and handle your firearm responsibly. Ensure the gun is unloaded before installing the trigger. Lastly, always point your gun in a safe direction and use extreme caution.