Premium Lower Parts Kit Installation Guide
Ready to complete your AR-15 build? This guide walks you through installing your RISE Premium Lower Parts Kit step by step. Follow along with our video below for a smooth, professional installation.
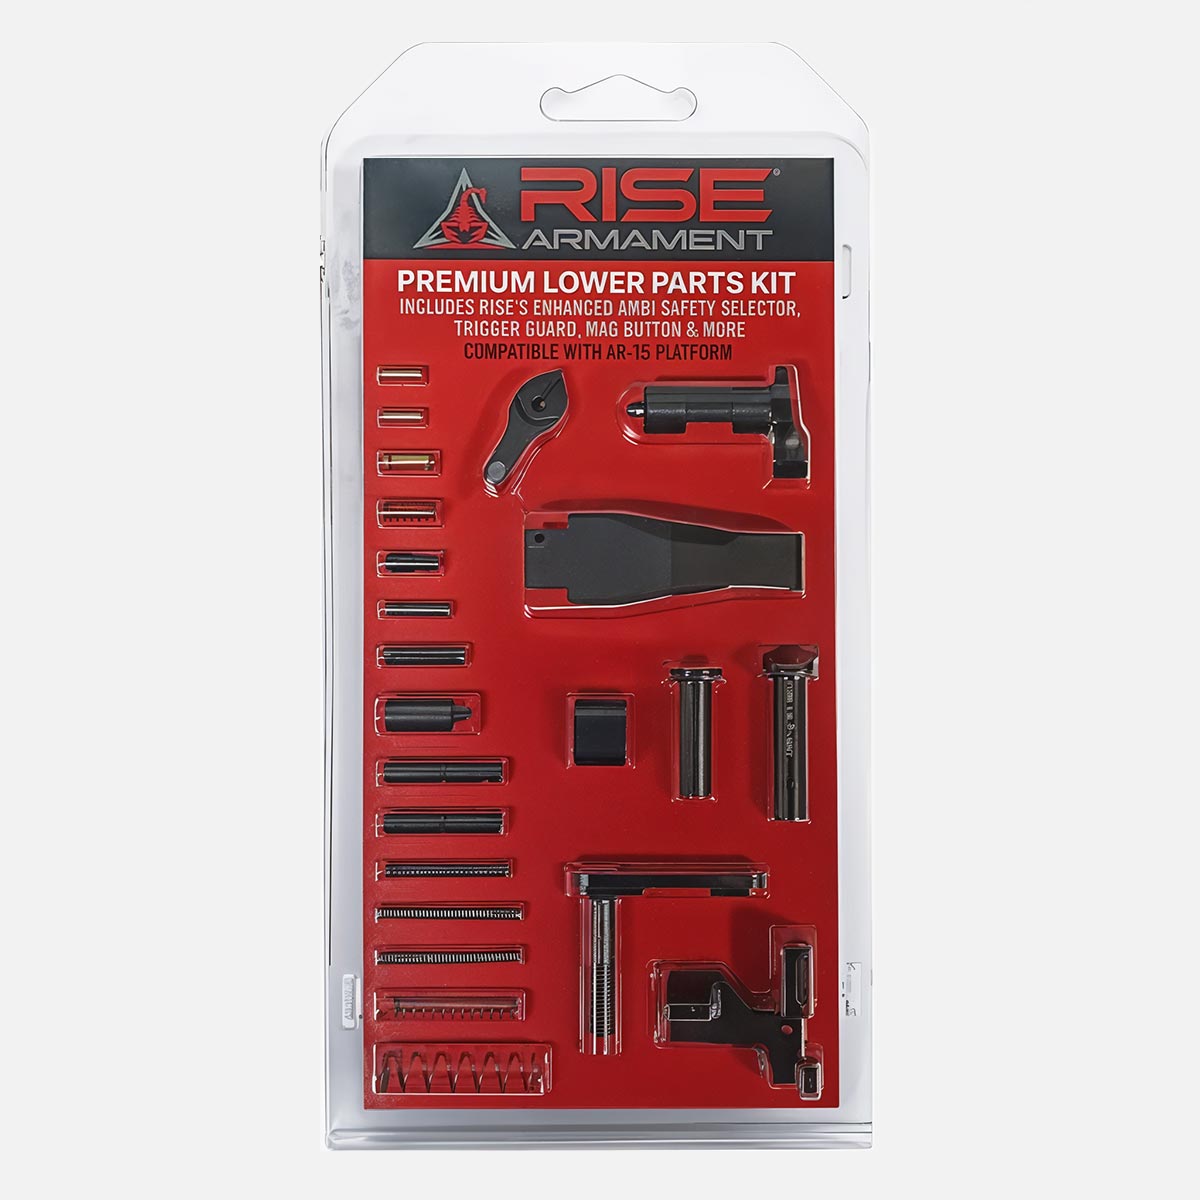
What’s in Your Kit
Your RISE Premium Lower Parts Kit includes everything you need to complete your lower receiver (minus the trigger):
- RISE Ambidextrous Safety Selector (1)
- RISE Enhanced AR-15 Takedown and Pivot Pins (1 of each)
- RISE AR-15 Trigger Guard (1)
- RISE AR-15 Oversized Magazine Release Button (1)
- RISE Enhanced AR-15 Bolt Catch (1)
- AR-15 Magazine Catch (1)
- AR-15 Trigger Pins, 5.56 (2)
- Safety Detent Pin (1)
- Safety Detent Spring (1)
- Takedown/Pivot Pin Detents (2)
- Springs for Takedown/Pivot Detents, 5.56 (2)
- Spring for Mag Catch (1)
- Bolt Catch Spring (1)
- Bolt Catch Plunger (1)
- Bolt Catch Roll Pin (1)
- Buffer Retention Pin (1)
- Spring for Buffer Retainer, 5.56 (1)
- Trigger Guard Pin (1)
Before You Start
Recommended Tools (not required but make the process much easier):
- Punch set (1/16″, 3/32″, 1/8″)
- Small hammer
- Needle-nose pliers
- Safety glasses
- Bench vise or receiver block
*Important: Always ensure your firearm is completely unloaded before beginning any work.
Installation
Follow along with our step-by-step video guide. Pause as needed to match your pace.
Key Time Stamps
- RISE Trigger Guard (0:00)
- RISE Bolt Catch (0:48)
- Ambidextrous Safety Selector (2:00)
- Click here for more instructions specific to the RISE Ambi Safety Selector
- RISE Magazine Release Button (3:05)
- RISE Enhanced Takedown & Pivot Pins (3:38)
Key Installation Tips
- Take Your Time: Small parts require patience. Rushing leads to lost parts and scratched receivers.
- Pin Alignment is Critical: Line up holes carefully before driving pins. Misalignment can damage your lower receiver.
- Spring Tension Matters: Many parts are under spring tension. Control them carefully during installation.
- Test Function: Check each component’s operation before moving to the next step.
Troubleshooting Common Issues
- Stuck Pins: Use proper punch size. Too small creates slippage. Too large damages pins.
- Lost Detents: Work over a towel or in a contained area. Keep spare detents handy. The RISE OH S#IT KIT is the perfect solution if you want to keep spare detents, springs, etc. on hand.
Final Function Check
Before calling it complete:
- Test magazine insertion and release with RISE Magazine Release Button.
- Verify RISE Ambidextrous Safety Selector engages properly:
- Flip it to the safe position and squeeze the trigger to ensure it does not fire on safe.
- Flip it to the fire position and squeeze the trigger to ensure proper trigger function.
- Repeat this process 3-5 times to ensure safety is installed and functioning correctly.
- Check Enhanced Takedown & Pivot Pin operation; punch pins out and back in to ensure smooth operation.
Need Help?
Stuck on a step? We’re here to help. Contact our customer service team with any specific questions about your installation.
- Email: [email protected]
- Phone: 844-747-3308
- Social Media: @risearmament on Instagram, Facebook, and X (DMs are open)
Remember: Proper installation ensures reliable function and safety. When in doubt, consult a qualified gunsmith.
Contact Us
Our inbox is always open. During business hours, we typically respond within two hours. Emails over the weekend will receive a response the next business day. [email protected]
Call
Monday–Friday
8:00 a.m.–5:00 p.m. (Central)
(844) 747-3308